FAQ
Please select below
INVmate II for Android (dehumidifiers)
Wi-Fi installation
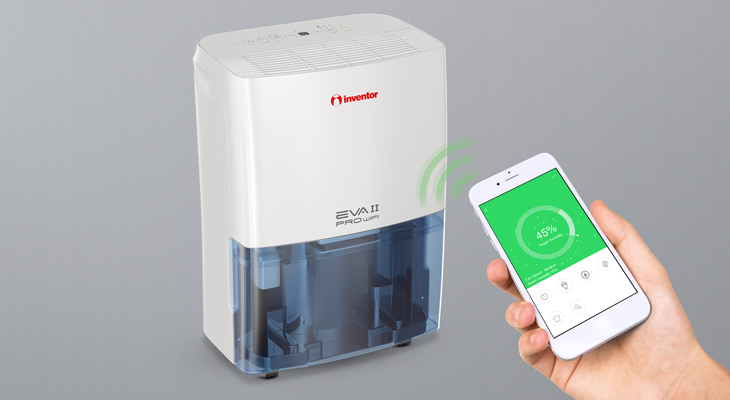
Thanks to the remote access feature, which is available on the EVA II PRO Wi-Fi & Power Wi-Fi models, complete access of your device whenever you desire is easily accomplished, from virtually anywhere! Follow the steps below, in order to connect the dehumidifier to your home's Wi-Fi network:
Step 1
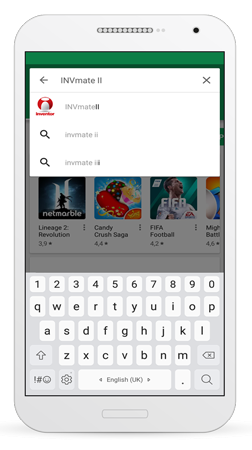
Search the Play Store by typing INVMATE II.
Step 2
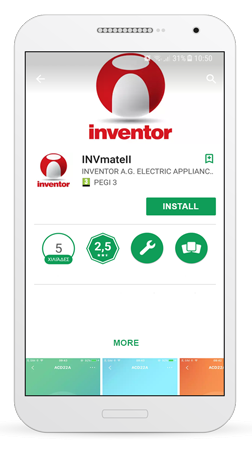
Install the app on your Smartphone/Tablet and open.
Step 3
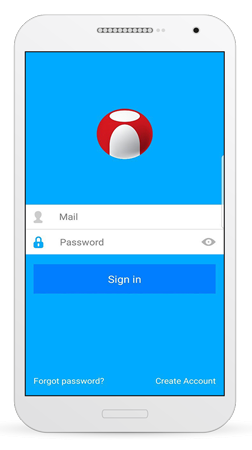
Select Create Account located at the bottom right. Create an account. A confirmation email with an activation link will be sent.
Step 4
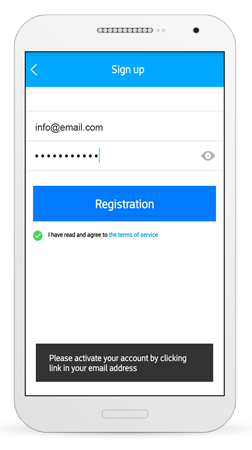
Enter your e-mail address and password. A pop-up window will inform you that you will need to activate your account by clicking on the link sent to your registration e-mail address.
Then open the e-mail you received at your registration e-mail address and click on the included link to activate your account. Return to the first screen of the app by pressing the < symbol in the upper left corner.
Step 5
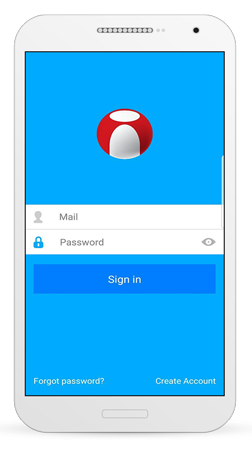
Enter your email address and password and choose Sign In.
Step 6
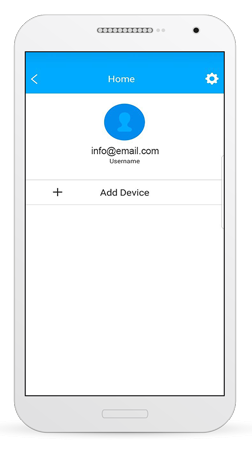
Press Add device as shown above.
Step 7
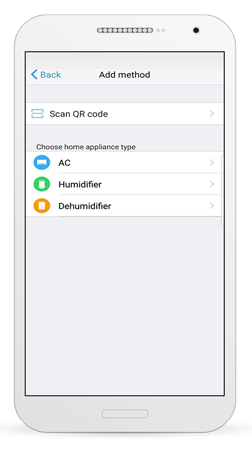
Choose Dehumidifier from the indicated menu to connect your appliance.
Step 8
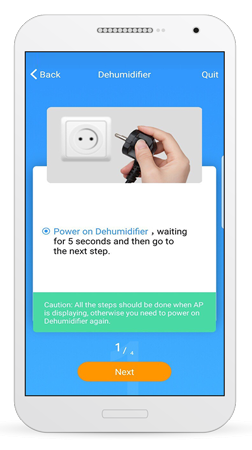
Power on your dehumidifier, wait 5 seconds then click on next.
Important Note: All the steps that will follow should be performed while the AP indication is displayed on the digital control panel of the dehumidifier, if there is no AP indication, please restart the above procedure.
Step 9
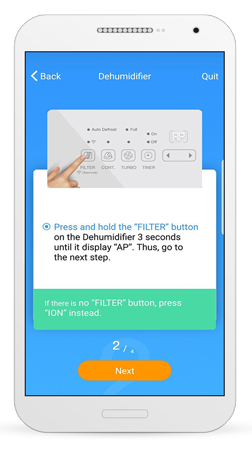
Press and hold the FILTER button of the dehumidifier for 3 seconds, once the AP indication is displayed on the control panel click on Next.
Note: If no Filter button is present, press the ION button instead.
Step 10
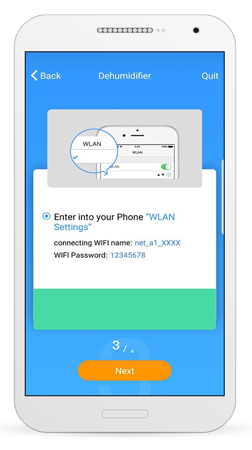
Connect to your dehumidifier's wireless network as shown above. Go to the wireless network settings of your Smartphone/Tablet, check for the correct indicated network name and fill in the password.
Step 11
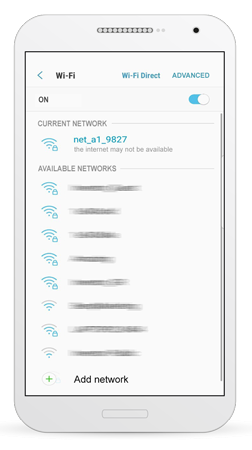
Be certain that the connection to the wireless network has been successful.
Step 12
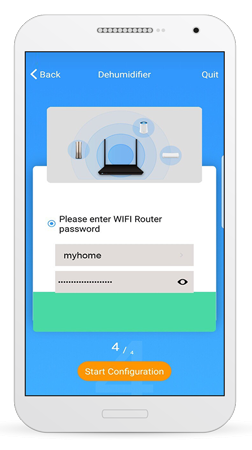
Return to the APP. The name of your router will be automatically displayed. Please enter your network password on the field below. Click on Start Configuration
Step 13
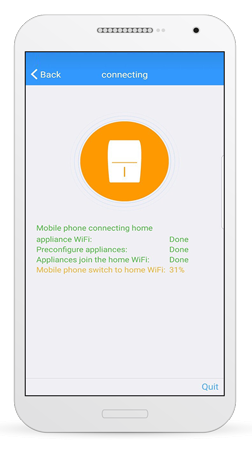
Once the pairing process is completed, the connection is activated.
Step 14
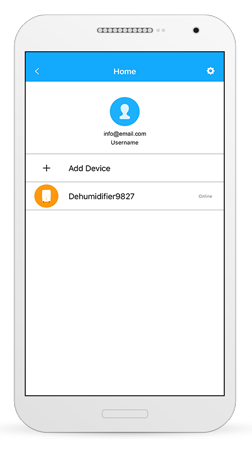
Choose the dehumidifier you recently added.
Step 15
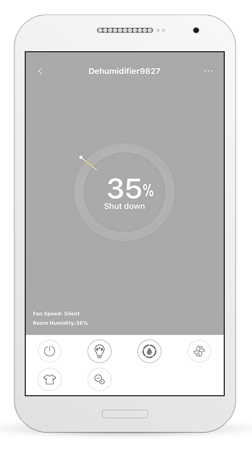
The dehumidifier is now successfully connected to your wireless network!
INVmate II for iOS (dehumidifiers)
Wi-Fi installation
Thanks to the remote access feature, which is available on the EVA II PRO Wi-Fi & Power Wi-Fi models, complete access of your device whenever you desire is easily accomplished, from virtually anywhere! Follow the steps below, in order to connect the dehumidifier to your home's Wi-Fi network:
Step 1
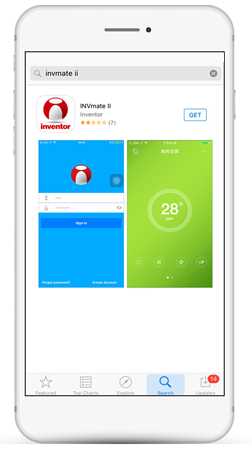
Search and install the INVMATE II app on your Smartphone/Tablet.
Step 2
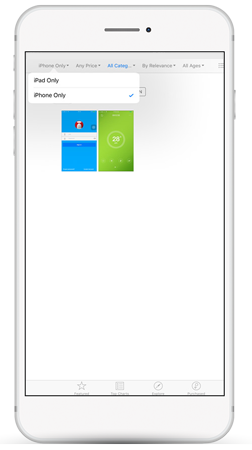
In case you are using an iPad, choose the iPhone Only option as indicated.
Step 3
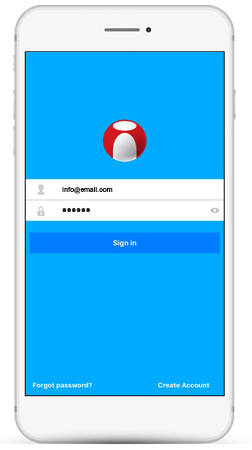
Select Create Account located at the bottom right. Create an account. A confirmation email with an activation link will be sent. Follow the link provided.
Step 4
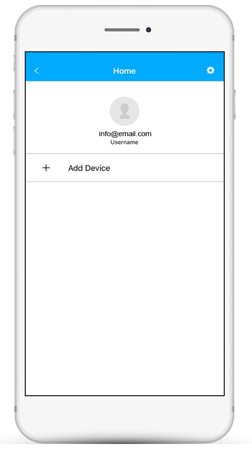
Once you activate the account, return to the app and choose Add device.
Step 5
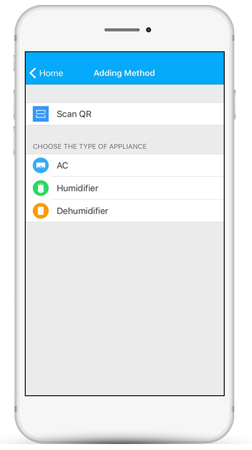
Choose Dehumidifier from the indicated menu to connect your appliance.
Step 6
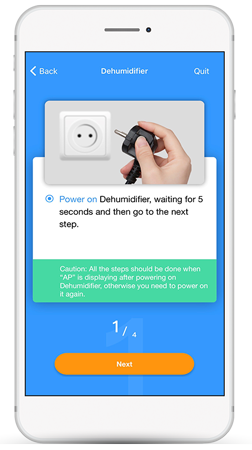
Power on your dehumidifier, wait 5 seconds then follow next step.
Important Note: All the following steps should be performed while the AP indication is being displayed on the digital control panel of the dehumidifier, if there is no AP indication, please power off and restart the above steps.
Step 7
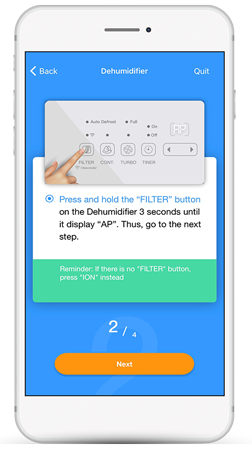
Press and hold the FILTER button of the dehumidifier for 3 seconds, once AP is displayed on the control panel follow next step.
Note: If no Filter button is present, press the ION button instead.
Step 8
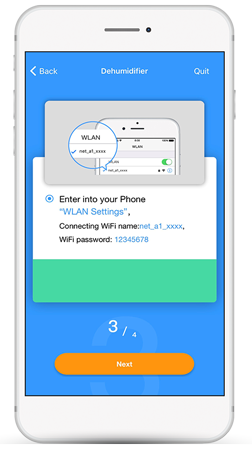
Connect to your dehumidifier's wireless network as shown above. Go to the wireless network settings of your Smartphone/Tablet, check for the correct indicated network name and fill in the password.
Step 9
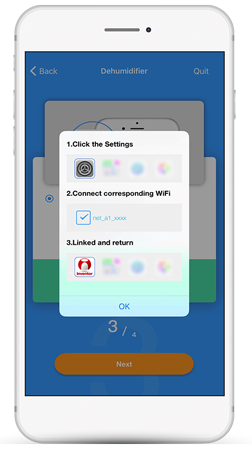
Please follow the above indicated procedure. Click on the Settings icon on your Smartphone/Tablet. On the new interface click on the symbol < SETTINGS located on the top right. Scroll up until you find the Wi-Fi icon and click on it. From the list choose: connect to net_a1_xxxx wireless network and then return to the app.
Step 10
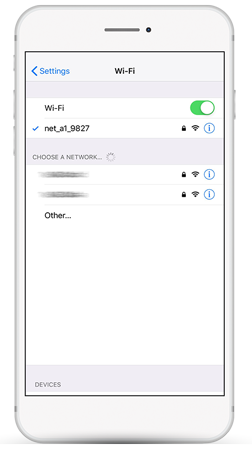
Be certain that the connection to the wireless network has been successful.
Step 11
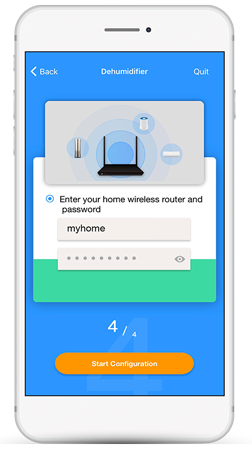
Return to the APP. The name of your router will be automatically displayed. Please enter your network password on the field below. Click on Start Configuration
Step 12
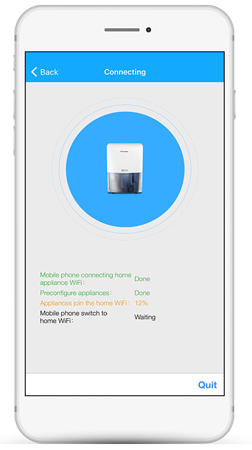
Once the pairing process is completed, the connection is activated.
Step 13
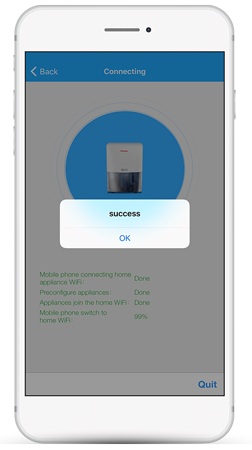
Your connection has been completed.
Step 14
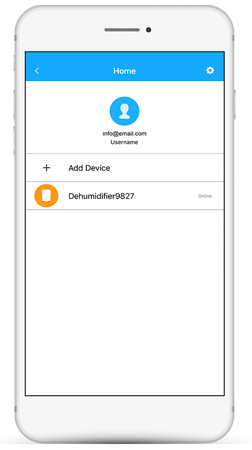
Choose the dehumidifier you have added.
Step 15
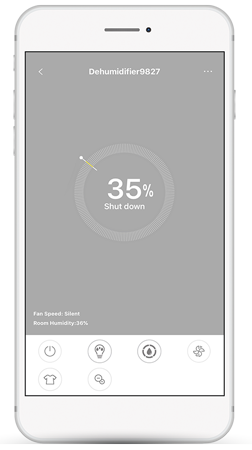
The dehumidifier is now successfully connected to your wireless network!
